Want to bleach dark hair at home? How to achieve a true shade of blond with step-by-step instructions for successful DIY hair bleaching.
 Source: Pexels
Bleaching Dark Hair Yourself
As a young man, I went through a phase where I wanted my hair just like Billy Idol’s. But bleaching very dark hair to a true shade of blond can be something of a challenge, especially if you’re doing it at home.
Luckily, I had a hairdresser friend to advise me and get the necessary supplies. The rest I did myself.
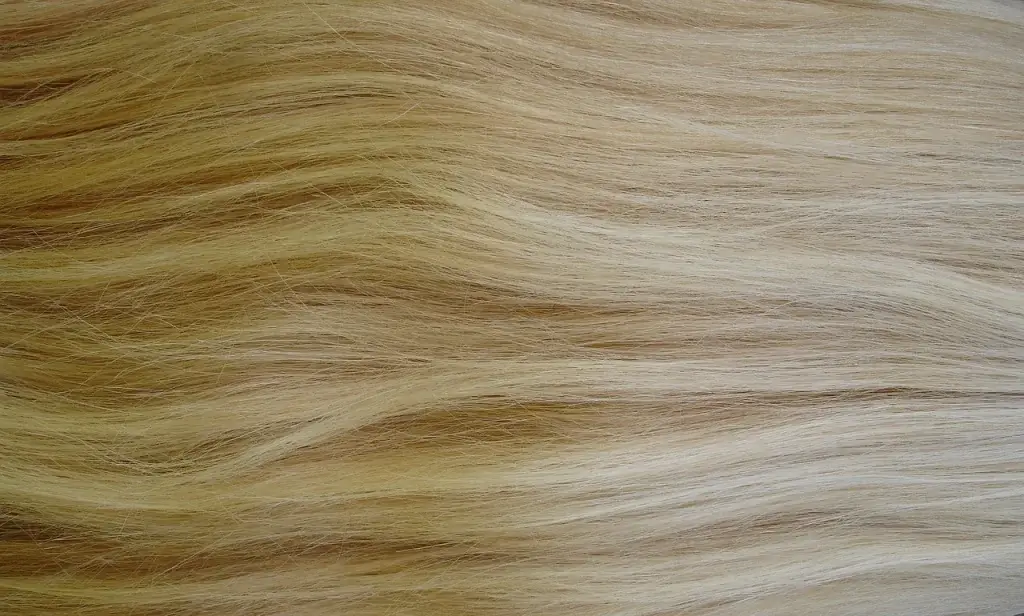
My hair tuned out “white blond,” as intended, with barely a trace of yellow; there was some at the back, but I managed to get rid of it later when touching up the roots.
Of course, people who liked my dark, clean-cut looks were upset. My parents wondered where they’d gone wrong. My boss and various colleagues thought I’d lost my mind. And several people at my place of worship stopped speaking to me. According to them, I’d turned into a “punk rocker.” It was one of the few times I’ve done something shocking.
To get the right vibe, I shaved off my mustache, but couldn’t get used to myself without it (and neither could anybody else), so I grew a full beard. When the dark roots came through, the look really came into its own; I never intended to be taken for a natural blond.
I touched up the regrowth twice before letting it grow out, reverting to my usual staid self. This, of course, made everybody happy again.
That was many years ago, and since then attitudes have changed. Nowadays, nobody would bat an eyelid—as long as it’s done well.
If You’re Going to Bleach Your Hair, Do It Properly
Getting good results is a lot easier today. The supplies my hairdresser friend got me are now available online, and they’re more effective than they were back then.
Nevertheless, things could go wrong; there’s more to it than slapping a bleaching solution on your head.
In this post, I’ll tell you how I successfully bleached my very dark hair at home, plus product updates in order that you get the best results.
Bleaching Products
First off, forget regular bleaching kits from drugstores intended for home use; they’re not strong enough for dark hair. Even after two or three applications, they never lighten beyond orange or a brassy yellow and cause untold damage.
It’s best to go to a specialist supplier where you can purchase all necessary components separately according to your individual needs. Or order a kit like Manic Panic’s Flash Lightning over the Internet. Unlike regular home bleaching kits, it’s available in 30- and 40-volume strengths—more on that later.
Prepare Your Hair and Scalp Before Bleaching
But because such harsh chemicals are necessary to bleach dark shades to a true blond, you’ll need to make sure your hair and scalp can withstand them. Not doing so is a common mistake that can lead to unpredictable color results and irreparable damage.
To make your scalp less prone to chemical burns and abrasions, it’s best not to shampoo for a couple of days before bleaching. If you can’t leave your hair unwashed for even a day, apply a deep conditioning product at least 12 to 24 hours prior.
A small amount of coconut oil the night before also helps. It’s one of the few oils able to penetrate the hair shaft and bind to some of the internal proteins, reducing the structural damage bleaching can cause. Leaving it overnight gives it time to absorb fully, so it won’t interfere with the lightening process. A thin, even coating is enough.
And last but not least—wait at least a month after straightening, relaxing, or perming; your hair will otherwise become brittle and break.
Patch Test
Unfortunately, there’s no way of preventing allergic reactions, so do a patch test before you begin the bleaching process.
- Wash your inner elbow or behind one ear and dry.
- Mix a tiny portion of the bleaching product, dab onto the cleansed area, and allow to dry. If using, do the same with your toner.
- If you experience blistering, swelling, redness, or any other irritation during the next 24 hours, remove the product immediately with cold water and, under no circumstances, proceed with the treatment.
What You Need to Bleach Dark Hair at Home
Another preparatory step that ensures best possible results is checking that you have all necessary tools and products at hand:
- Latex or plastic gloves
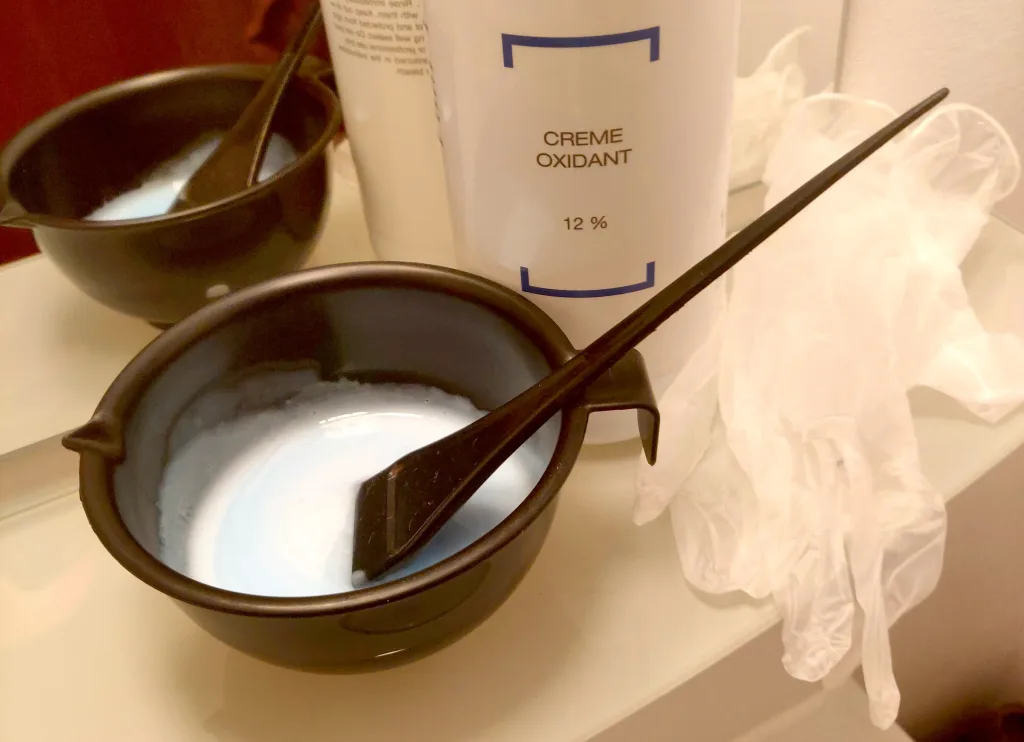
- A bowl made of glass or plastic (never use metal)
- A tinting brush
- A plastic rattail comb
- Sectioning clips (if your hair is longer)
- Petroleum jelly to protect your hairline
- Peroxide cream developer of appropriate strength for dark hair (see below)
- Purple or blue bleaching powder (purple and blue help reduce brassiness (warmth and yellow tones), but white will suffice if nothing else is available)
- A plastic cap or bag large enough to fit over your hair—preferably transparent. Alternatively, use aluminum foil
- Color toner (one in a light, cool blond shade and one in medium ash blond in case the result it too dark and you have to bleach twice)
- Balancing shampoo (to restore pH balance after bleaching)
- Protein-balancing conditioner
- Purple shampoo and conditioning products to eliminate or at least play down brassiness, which is hard to avoid when bleaching dark hair (these may be advertised for blond, silver, white, or gray hair, but all do the same job)
- Ardell’s “Red Gold Corrector Plus” (mixed with bleaching powder and developer, this will further prevent brassiness while acting as a conditioner)
Cream developer and bleaching powder are included in the contents of most kits—I recommend Manic Panic’s Flash Lightning for dark hair.

Peroxide Cream Developer Strengths
Implement cream developer strengths as follows:
- If you want to lighten hair that is naturally blond, you need a 20-volume cream developer.
- To bleach light to medium brown hair, you need 30-volume. When bleaching short hair or close to the root, 20-volume may suffice.
- For dark brown to black, you need 30- or 40-volume depending on hair texture (30 for fine hair and 40 for coarser types), which gives maximal lift. Never go beyond 40-volume—it will burn your scalp and destroy your hair. When bleaching short hair or close to the root, 20- or 30-volume may suffice.
- The strength of your toner should be 10-volume. This deposits color without lift. Don’t use a product that requires more than 10-volume; your aim is to conceal brassiness and not to further lighten.
| Volume | Percent | Lift Level |
|---|---|---|
| 10 | 3% | Deposits color only |
| 20 | 6% | 1 – 2 |
| 30 | 9% | 2 – 3 |
| 40 | 12% | 4 – 5 |
Diluting Cream Developer
Instead of buying developers of different strengths, you can dilute with water. If you dilute 40-volume developer with water to a ratio of 1-to-1, it will become 20-volume. If you dilute 1-to-1 again, it will become 10-volume.
The only disadvantage of diluting is that the developer becomes runny, which can make it difficult to work with.
How to Bleach Dark Hair at Home in Six Steps
Step 1
If you have longer hair, divide it into four sections—two at the front, and two at the back—and secure with clips.
Skip this step if your hair is too short to divide.
Step 2
Now mix the bleaching powder and cream developer according to the directions on the product packaging. A ratio of 1-to-2 respectively is usual, e.g., 3 oz. powder and 6 oz. developer.
If the mixture is too fluid, add more powder. It should, however, be runny enough to properly coat the hair.
Step 3
For Short Hair
Brush on the bleaching mixture, starting at the back. This is where your hair is naturally at its darkest and takes longest to lighten.
To avoid chemical abrasions, take care not to get the product on your scalp.
For Longer Hair
This is tricky, so you might need someone to help. You also have to work very quickly during this and the next step, or your hair color will turn out uneven.
Starting at the back of your head, brush on the bleaching mixture, working from the hair ends to the roots, but don’t cover the roots yet.
Step 4
Skip this step if your hair is short.
For longer hair, after you’ve worked through all four sections, apply the bleach to your roots. It’s recommended to reduce developer strength by 10 if using 30- or 40-volume.
Starting at the back of your head, expose your roots by systematically parting and flipping your hair with a rattail comb or the tip of a tinting brush. Work from the top of your head to the nape of your neck in the back sections, and from the center to the sides of your head in the front sections. To avoid chemical abrasions, take care not to get the product on your scalp.
Why are the roots left until last? The heat from your head causes the bleach to develop more quickly at the roots than it does further down the hair. Therefore, the color would turn out uneven if you were to apply the bleach from root to end in one go. In other words, your roots would be lighter than the rest of your hair.
Step 5
Now place a plastic cap, bag, or aluminum foil over your hair. The heat that develops beneath this will boost lift.
Your hair will go through various color stages as the bleach does its job. First, it will turn from its natural dark color to orange, then from orange to yellow, and finally to light yellow.
Check the color every 10 minutes. How long this takes varies from person to person, depending on hair length, texture, and color. On all accounts, the bleach stops working after 60 minutes. Letting it sit for longer will only damage your hair and scalp with no further lightening effect.
You may only reach orange or dark yellow during the first treatment if you are very dark, especially if a red or coppery sheen is present. In this case, wait a month, then bleach again to achieve a lighter shade.
Safety Note
Because dark hair needs stronger chemicals and more time to develop, you’re bound to experience a little discomfort. If, however, it at any stage becomes unbearable, rinse immediately with cool or cold water.
Step 6
As soon as your hair has reached the light-yellow stage (or if 60 minutes have elapsed without reaching this stage), rinse under lukewarm water.
If you’re satisfied with the color and don’t wish to tone, apply a balancing shampoo and protein-balancing conditioner. Otherwise, wait until after you’ve toned.

Tone and Dispel Brassiness
If you’re naturally dark, you probably won’t get your hair up to your desired “white blond” tone with bleach alone, and certainly not in a single treatment. It will still have too much warmth, especially at the back. Apply toner in a cool shade like silver or light ash to neutralize this.
You should apply toner in exactly the same way as you applied the bleach. It usually takes 20–30 minutes to develop, but refer to the instructions provided in the package contents. Always leave longer to develop at the back where brassiness is most prevalent.
When you touch up your roots after four to six weeks, you’ll be able to get rid of any remaining warmth. Until then, regular use of purple shampoo and conditioning products should help.
But What If Your Hair Is Still Too Dark?
If your hair hasn’t reached the light-yellow stage, in spite of leaving the bleach for a full 60 minutes, rinse and apply an ash toner. This will counteract the yellow and orange tones and give you a color presentable enough to face the world until you can bleach a second time. Your toner should be at least as dark as your current color, since it has no lightening effect. Therefore, think in terms of medium ash blond.
If you think the brassier shade looks good on you, as it does on some young men depending on complexion, leave out the toner for the time being.
After a month, you can bleach again. But first, your hair needs to recuperate. If you don’t wait, especially if you’ve used a 30- or 40-volume developer, it will become porous and break.
In case you decide to bleach a second time without waiting, use a 20-volume developer. If your hair is long, avoid the roots, applying only to the darkest lengths. Check every five minutes and rinse when the color appears relatively even.
How to Bleach Your Roots
If you have very short hair, touching up only the roots will be impossible. You’ll inevitably end up covering the ends, which will cause immense damage when you bleach for the third or fourth time.
To avoid this, it’s better to let it grow out.
If you don’t mind the damage, be prepared that you’ll at some point have to opt for a buzz cut or shave your head completely. On the other hand, regular trims and conditioning treatments may extend the life of your hair.
Whether long or short, use only 20- or 30-volume developer for the touch-up, depending on hair color and texture.
For longer hair, repeat steps one to six above, but leave out step three.
Your roots shouldn’t take as long to lighten as your whole head—developing time is usually about fifteen minutes shorter. Nevertheless, check the color every ten minutes as you did the first time you bleached.
When you do your roots for the first time, comb the bleach through your hair to the ends ten minutes before you rinse. This should get rid of unwanted warmth.
Apply toner in the same way—first to your roots, then comb through to the ends ten minutes before rinsing.
You should bleach regrowth every four to six weeks. Doing so more often will cause damage, while waiting too long will leave you with more than just roots and be as difficult to lighten as your whole head was the first time you bleached.
Continue to use purple shampoo and conditioning products between treatments to keep your color vibrant.
Why Bleach Dark Hair at Home?
You may be wondering why I chose to bleach my dark hair at home, especially because this is so difficult to do. There were three reasons.
- I had seen people return from hairdressing salons with yellow hair that was supposed to have been blond/e.
- I didn’t want to be seen in a hairdressing salon, and especially not with bleach or dye on my head.
- I thought it would save me money.
It worked because I followed expert advice, used the right products, and took precautions.
If you’re not prepared to make the effort, you’ll be better off going to a salon where, as a well-informed client, you’re bound to get the best possible results.
© 2024 J. Richardson
Related Posts
Disclaimer
The information provided by The Neat and Tidy Man (“we,” “us,” or “our”) on theneatandtidyman.com (the “site”) is for general informational purposes only. While we endeavor to keep the information up to date and correct, we make no representation or warranty of any kind, express or implied, regarding the completeness, accuracy, reliability, suitability, adequacy, validity, or availability of any information on the site. Under no circumstance shall we have any liability to you for any loss or damage of any kind incurred as a result of the use of the site or reliance on any information provided on the site. Your use of the site and your reliance on any information on the site is solely at your own risk.


